Description
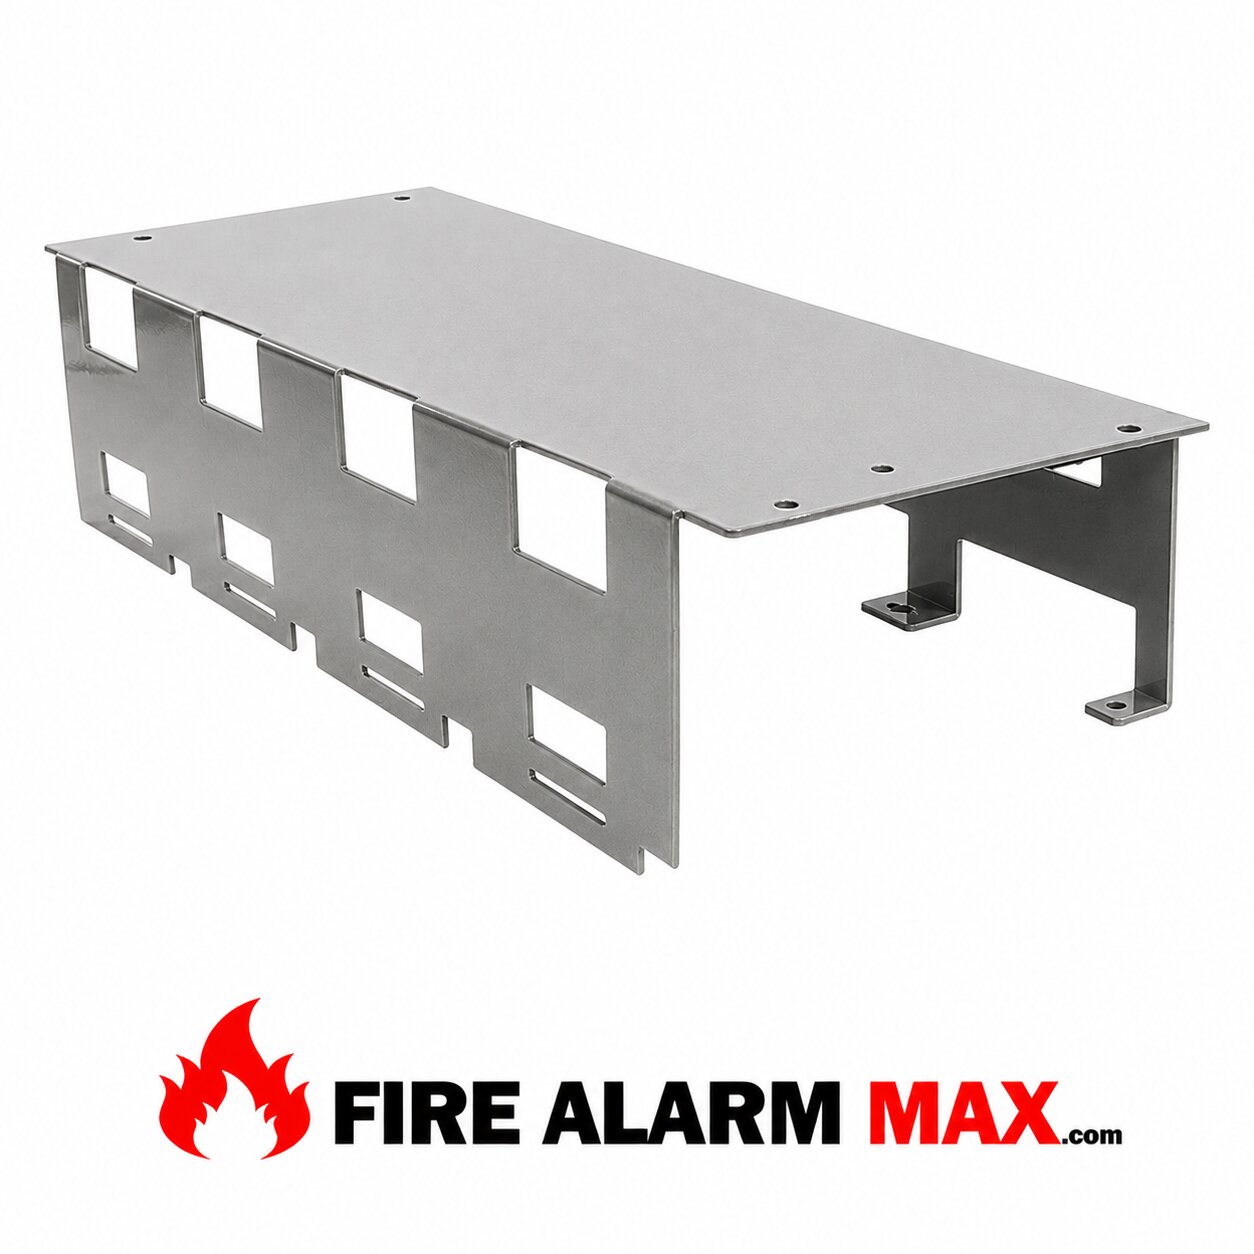
Notifier CHS-4 Chassis
Installation
In each row of the cabinet that will employ XP Transponder modules, install a CHS-4 or CHS-4L Chassis. For proper grounding of the XPP-1 to the cabinet, connect the grounding cable (provided with the XPP-1) to the left chassis mounting screw as illustrated.
Step 1
Insert the XPP-1 into the leftmost slot on the CHS-4, angling the upper end of the module into position as shown above.
Step 2
Carefully push the XPP-1 toward the back of the cabinet until the module is vertical.
Step 3
Pull the XPP-1 down until the module engages the slot in the chassis.
Step 4
Align the module screws with the threaded holes in the chassis and secure them into place.
Install the AVPS-24/AVPS-24E over the screw mounts on the CHS-4/4L Chassis and secure it with two nuts.
Install the APS-6R over the mounts on the CHS-4/ 4L Chassis and secure with standoffs inserted into the APS-6R mounting slots.
After the XPP-1 module has been installed into the CHS-4, the remaining system modules may be installed. Interconnecting ribbon cables must be installed at the same time as each XPC, XPM, or XPR module, as outlined on the following pages.
The procedure for mechanical installation of XP Transponder modules into the CHS-4 Chassis and connection of the module ribbon follow on the next two pages.
Notifier CHS-4 Chassis


Reviews
There are no reviews yet.